
THE PERFECT BATHROOM. PART 1 – VANITIES
GETTING STARTED
You are finally getting to the bathroom renovation stage that you’ve been postponing for a long time because there has never been enough time, it’s stressful and of course, it can be expensive.
So you’re ready to take the plunge and commit to your project, but don’t know where to start. In this first part of renovating your bathroom, we are talking in-depth about choosing and designing your bathroom vanity and what to keep in mind. We hope this will make some things clearer and can assist you in making the best choice for your bathroom.
We all have flipped the Interior Design magazine pages, followed many bathroom designers on Instagram, and saved hundreds of pins from Pinterest in order to find the perfect vanity that will tick all our 'not so modest' boxes. It’s not a lot to ask for the perfect size, color, material, and designer vanity that looks amazing, is a standout piece, easy to take care of, practical and makes everybody say ‘wow’. Right!?
In design magazine photos all items look amazing, they can have the most unreal design, color and we won’t even talk about the impractical side of it, but we love it and we want it. Well, in real life it doesn’t work like that. In real life, we actually have to put a lot of thought, time, and research into the process and on top of that play with the limitations that we have – be it a small space, plumbing, or budget.

STEP 1 VANITY LOCATION
There are some things that we can’t always change in an existing bathroom like the size of your bathroom and how the plumbing is done. You don’t want to have a vanity that will take too much space. Make sure you still have enough space around the vanity to open the doors and drawers without a problem. We don’t want to add a factor of claustrophobia into the mix of all the things.
Think about in which wall the plumbing is done and where it would be best to install the vanity. Because let’s be honest, we don’t need this extra cost to change the plumbing inside the wall just because we like the other wall better.

STEP 2 SIZE OF A VANITY
Now that we know where the vanity will be, we need to measure how big we want it to be.
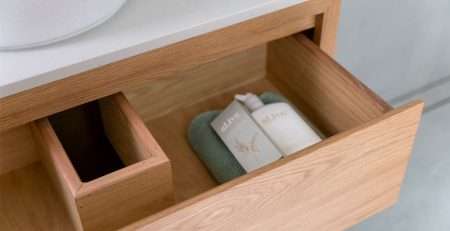
We need to take into account how many basins there will be. Will there be only one or maybe two. A standard basin is usually about 900mm from the floor and it is an average good height. Wall hang vanities don’t touch the floor and don’t have legs, so you need to think about how much space would you like to leave below. For example, if you want to have a basket with towels or some decorative pieces under the vanity, you need to think about it before designing the vanity. If you have drawers or doors, make sure you have enough room to open them.

STEP 3 CHOOSING HARDWOOD
When it comes to choosing the colour and type of your hardwood vanity, you have two options: clear finish or stained.
A clear option means that your vanity will keep its natural timber colour. It is the last protective paint coat that is preventing scratching or damaging the vanity.
The stained finish will make the wood come alive. It won't stay on top of the surface like paint, but it will move into the cracks and pores of the wood.
The stain is not a protective coat, so we would need to add another layer of sealer.
From the photo, the first four hardwood samples are stained: Tasmanian Oak #4, Tasmanian Oak Charcoal, Tasmanian Oak Lime Wash and Tasmanian Oak #1. Tasmanian Oak - It has a lot of thin vertical lines and it stains nicely, which means you can paint it whatever colour to match other furniture in the room, apartment or house.
Spotted Gum - Has like the name says darker spots which make the colour shades vary from light to darker.
Black Butt - Although the colour can also vary, it is mostly lighter brown colour.
American Oak - It has large growth circles and is mostly light brown in colour.
Vikash - Or Victorian Ash has mostly lighter colours and stains very well.
Wormy Chestnut - Funny name but beautiful wood. Like the name suggests the wood has dark lines that remind of little tunnels created by worms and it is a popular choice with our customers.

STEP 4 LOCATION OF BASINS
Another thing you need to keep in mind is that once you have decided how many basins you want to have, is the location of the basins. For example, if it’s one basin, do you want to place it in the center of the vanity or if you don’t like symmetrical patterns, you have the option of an offset location, which means you can put your basin towards the edge of the vanity and use the rest of the space on the other side of the vanity for toiletries or why not a statement flower arrangement for a splash of color.
STEP 5 CONFIGURATION
When it comes to designing the practical side of the vanity, the options are endless.
For example, if you are the kind of person who likes everything to be tucked away and not seen openly, you would consider drawers with doors. Or if you like to have some design features on the shelves or things to be accessible quickly, you would consider open spaces and shelves.
Think about your habits in the bathroom because we all have our own little routines and we like to have things in a certain way. For example, if you are a right-hand person and you like all your toiletries to be on the right-hand side in one drawer and towels beneath that drawer in another bigger drawer, then you wouldn’t want to design a vanity with no drawers only because it looks better or cool.
At the end of the day, we still love our little habits because they make us more efficient.

STEP 6 VANITY TOP MATERIAL
There are so many different options for a hardwood that you can literally decide by looking if you like stained wood, more light coloured wood, not so lined etc.
The good thing about timber vanities is the fact that they suit almost every bathroom despite the colour. There is something about this warm natural material. You can have cool grey colours in tiles, in a concrete basin or in tapware and it will still go perfectly well with warm timber. It’s a perfect balance.
You can also decide whether you want a stone top or not. If you go for a stone top, then there are again so many options to choose a perfect stone that will be in harmony with the vanity and the rest of your bathroom.

STEP 7 THE VANITY FRAME
Then we have the frame of the vanity. You can choose either a thick frame that looks bulkier and heavier or a very thin frame or no frame at all.
Think about the fact that the frame also takes space, so if you are already playing with small space, then having this little bit of extra vanity space wouldn’t hurt and you might consider the thinner frame. On the other hand, if your bathroom style is edgy, modern, and has some statement design pieces, then this thick and bulky frame would look really great and make it a true centerpiece.

STEP 8 PUSH TO OPEN OR FINGER PULL OPTION
You might think that opening the doors or pulling out the drawers isn’t really a hard job but even in that department you can add some interesting features that might not always be noticeable but add this little extra design flair.
It really comes down to convenience and aesthetics. If you don’t like doorknobs or handles and want the vanity to be as clean and minimal as possible you should consider the next options.
Doors can be opened with the push to open option which means you just need to apply a little bit of pressure with your fingers or hand on the door and it bounces slightly open which makes it easy to open the door.
Another option is the Finger Pull. There is nothing automatic about this feature but those who appreciate design, can appreciate this. It makes it easy to put your fingers behind the edge and pull the drawer out.
Having old-school door knobs or handles is always an option that will never disappear. When choosing this option, you can add extra design detail to your vanity.
For example, if your vanity is modest in a design sense, you can choose interesting and outstanding handles. They come in every shape, color, and print. And the good thing is that if you get tired of the knob color, just change it, buy a new different set and match it with a new color towel set and your bathroom has a fresh look without spending a lot of money.

STEP 9 TAPWARE
Choosing a Tapware that will work in harmony with the vanity and basin can be fun but also overwhelming. Again, you have so many options regarding color, material, shape and size, and location. First, you want to decide whether the tapware will be on the wall or you want it on the vanity next to the basin. If you want to have something different, one option is to choose for example a long Goose Neck Hob Mixer that looks dramatic and elegant at the same time.

STEP 10 SYMMETRIC DESIGN / ASYMMETRIC DESIGN
Everybody is different which means that everybody has different tastes and we all interpret beauty differently, which is amazing because only that way we come across ideas that we might not consider if everybody had the same taste.
When it comes to design you might say people are divided into two big groups. One group can be characterized as ‘neat’ and the other one ‘messy’.
People in the first group prefer symmetric patterns. They like when items are nicely lined, at the same height, or perfectly centred. To an eye, it is very relaxing to see that every design feature has its place and is complimenting the other piece on the other side.
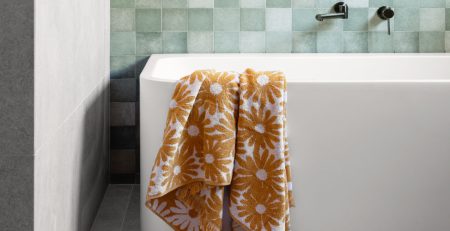
People in the second group like to experiment a bit more. They don’t mind this 'organized chaos' if we can call it that. They are a little bit more flexible with options like the location of things, where there is no need to match one side with another. For example, having a basin on one side of the vanity can be a good example of when choosing tiles and adding few feature tiles in the mix that are different in terms of pattern and colour and place them randomly on the wall or on the floor.
It all comes down to your personal taste and preferences. Stick to what you like not what looks better because this bathroom will be yours and you’ll be spending a lot of time there.

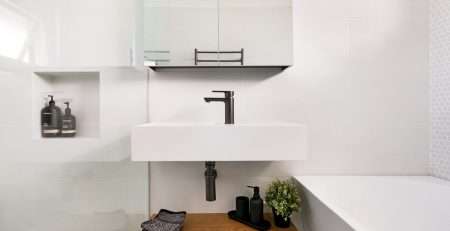
STEP 11 SHAVING CABINET AND MIRROR
In the previous chapter, we talked about symmetric and asymmetric design. When it comes time for you to choose a shaving cabinet, take your preferences into account.
You can have a shaving cabinet lined with your vanity, which means from one edge to another, or you can make it smaller than your vanity and put it in the center, or only have some shelves on one side and have a mirror on the other side. There are many options.
Having a big mirror in your bathroom has few good things about it. First, the mirror has the ability to create the illusion of a bigger space.
Secondly, it reflects the light perfectly, so if you have a window on the opposite wall, you can reflect maybe the green trees from outside and also natural light which trumps any other light.
So as you can see there are quite a few things to keep in mind or to pay attention to. If there is one tip we can give you that we think above all, is the Timeless Design.
What it means is that trends are constantly evolving and changing. Try to stay true to your personal taste and avoid short time fads. You are already putting so much effort into designing a perfect bathroom and you don't want to realise in few months that these cool burnt orange tiles on the wall are driving you crazy or the vanity you designed is impractical and doesn't have enough space.
Just take your time and don't compromise on quality.